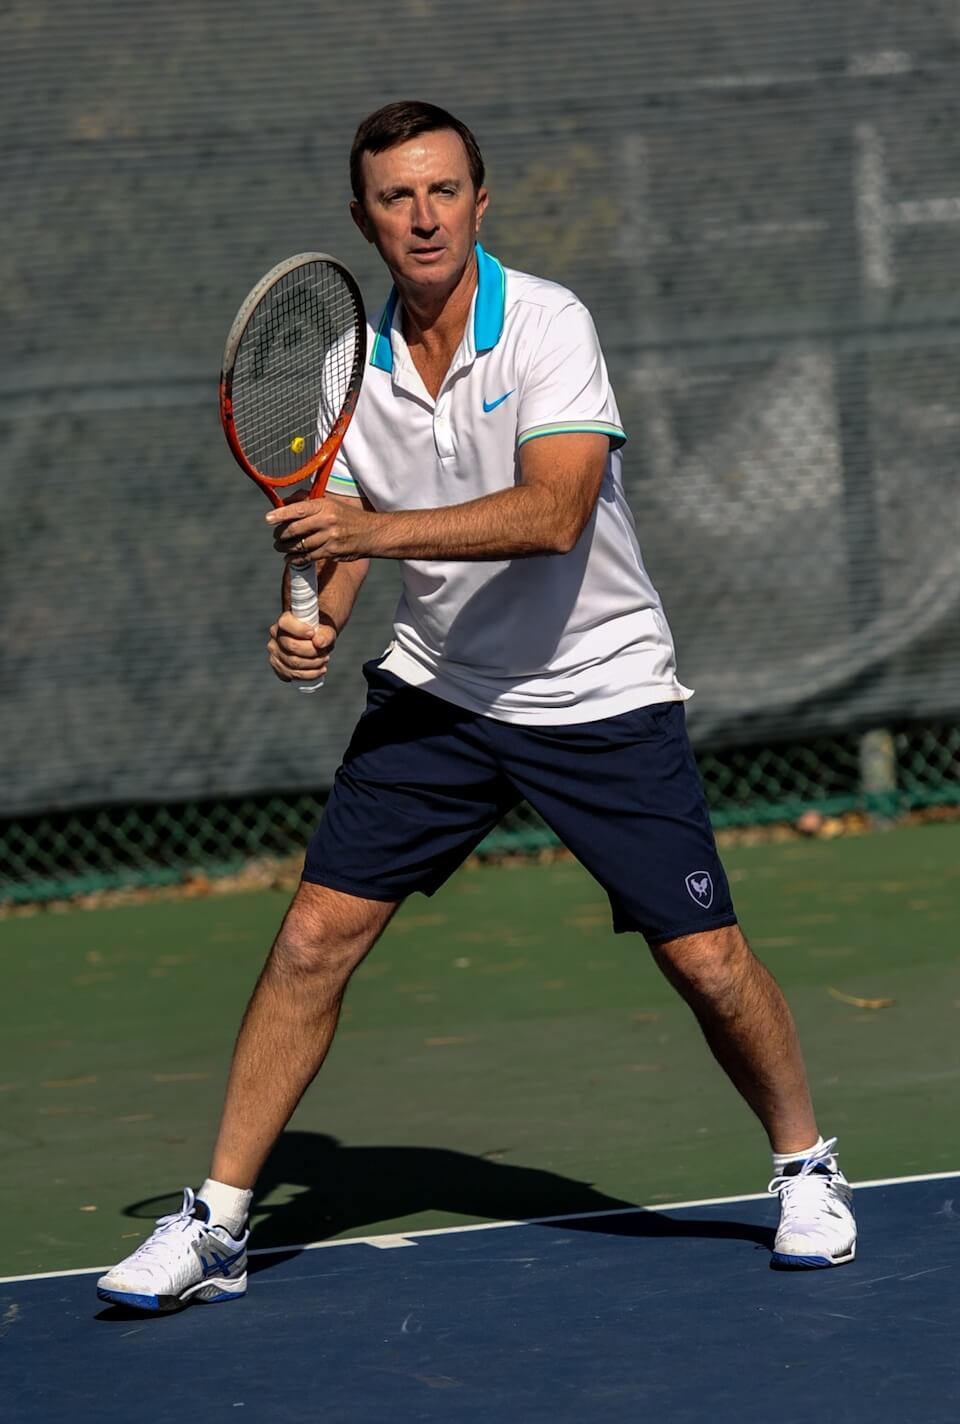
Marty Smith has
been the Director of Tennis for more
than 20 years at the famed New York Athletic Club, the No.
1-rated athletic club in the United States. A native of
Australia, he was a top five-ranked Australian junior players
and was the two-time Southern Conference singles and doubles
champion at the University of Tennessee at Chattanooga. He
graduated from UTC and also received his MBA at St. Thomas
University in Miami. He is a resident of Pelham, NY.
Sample Tips
Here are a sample of photos and summarized tips from Absolute Tennis
Sample Tip #1
A strong and reliable stroke starts with establishing good balance
- keeping your back reasonably straight, shoulders level, and head
upright as you play the shot. (Chapter 1 - Balance)
Sample Tip #2
Good balance helps you control the racquet and push more
forcefully from the ground for increased power. (Chapter 1 -
Balance)
Sample Tip #3
Learn to move your arms in opposite directions and widen and
narrow your stance to enhance your balance. (Chapter 1 - Balance)
Sample Tip #4
Many strokes involve grounding one leg for stability and pivoting
the other leg for balance. (Chapter 1 - Balance)
Sample Tip #5
The kinetic chain reimagines the body as a system of chain links,
whereby the energy generated by the legs is transferred and
increased up the body, culminating in an end point power surge.
(Chapter 2 - Kinetic Chain)
Sample Tip #6
Using the kinetic chain correctly improves stroke power and
consistency and reduces stress on the body. (Chapter 2 - Kinetic
Chain)
Sample Tip #7
Setting a wide, strong base allows you to maximize the kinetic
chain's benefits. (Chapter 2 - Kinetic Chain)
Sample Tip #8
You must be responsive to the circumstances and use the right
amount of body movement during your swing. (Chapter 2 - Kinetic
Chain)
Sample Tip #9
A good split step quickens your reaction time and adds power to
your first step. (Chapter 3 - Movement)
Sample Tip #10
Following the split step, lower your body and lean and pivot your
feet in the direction you need to move. (Chapter 3 - Movement)
Sample Tip #11
The crossover step is an important movement to learn to speed your
recovery back to the middle of the court. (Chapter 3 - Movement)
Sample Tip #12
Control of the racquet should come mostly from the palm of the
hand, not from excessive squeezing pressure of the fingers.
(Chapter 4 - Grips)
Sample Tip #13
The formula for kinetic energy results in the doubling of
velocity(racquet speed) having a much larger effect on the energy
delivered to the ball than doubling the mass. (Chapter 4 - Grips)
Sample Tip #14
Because the continental grip is used on many shots it is important
to learn - use ball tap exercises and the wall to master it.
(Chapter 4 - Grips)
Sample Tip #15
The platform serve is the favored stance at the recreational
level. It has the advantages of simplicity as well as good body
stability and leg push. (Chapter 5 - Serve)
Sample Tip #16
The pinpoint serve is a common stance on the pro tour. It has the
advantages of strong forward momentum and fast hip rotation.
(Chapter 5 - Serve)
Sample Tip #17
There are three main types of serving backswings (pendulum,
waist-high, and abbreviated) and which one you choose depends
largely on swing tempo and ball toss height. (Chapter 5 - Serve)
Sample Tip #18
On the ball toss, the left hand moves down slightly, then lifts
smoothly pointing towards the right net post before releasing the
ball slightly above head level. (Chapter 5 - Serve)
Sample Tip #19
Toss the ball about two feet above contact and forward into the
court. This allows time for a full build up of energy in the legs
and will tilt the body forward at contact for added power.
(Chapter 5 - Serve)
Sample Tip #20
Setting a wide, strong base allows you to maximize the kinetic
chain's benefits. (Chapter 2 - Kinetic Chain) In the trophy
position, bend your knees and tilt your shoulders upward to create
a body position that will spring you up and forward powerfully to
the ball. (Chapter 5 - Serve)
Sample Tip #21
Following the trophy position, the legs straighten, the hips
rotate, and the elbow lifts as the racquet drops down the back.
(Chapter 5 - Serve)
Sample Tip #22
A deep racquet drop stretches the shoulder muscles, lengthens the
swing, and lags the racquet to add power to the serve. (Chapter 5
- Serve)
Sample Tip #23
Following the racquet drop, the hitting elbow continues to lift
and the shoulders cartwheel to help maximize contact height.
(Chapter 5 - Serve)
Sample Tip #24
At the top of the serving swing, the edge of the racquet leads
before the wrist pronates and squares up the strings to the ball
at contact. (Chapter 5 - Serve)
Sample Tip #25
The flat serve is important for delivering power, and the slice,
slice-topspin, and kick serves add variety and consistency to your
serve. Each serve requires a different ball toss location.
(Chapter 5 - Serve)
Sample Tip #26
The strings brush the ball in different ways to create the
different serving spins. (Chapter 5 - Serve)
Sample Tip #27
On the slice serve, the leading edge of the racquet moves toward
the right post as the strings brush around the two o' clock part
of the ball. (Chapter 5 - Serve)
Sample Tip #28
The topspin on the kick serve is created by the racquet moving up
from a horizontal(left) to 45 degree angle(right) at contact.
(Chapter 5 - Serve)
Sample Tip #29
The shoulders turn more to begin the kick serve(left) than on
other serves(right). (Chapter 5 - Serve)
Sample Tip #30
Think before serving on how you can keep your opponent off rhythm
by mixing up the spin and placement on your serve, and aim to get
at least 60% of your first serve in. (Chapter 5 - Serve)
Sample Tip #31
The serve is a very important shot that should be given a high
priority during your practice sessions. Use targets to improve
your serving accuracy and practice responding to your opponents
return of serve. (Chapter 5 - Serve)
Sample Tip #32
Learn the four key stages of the serve - power position, racquet
lag, body positioning at contact, and follow through. (Chapter 5 -
Serve)
Sample Tip #33
A good return serve begins with a strong split step and
anticipating your opponent's serve through their ball toss
location and body alignment. (Chapter 6 - Return of Serve)
Sample Tip #34
When returning a fast serve, lower and shorten your backswing and
make contact in front of the body. (Chapter 6 - Return of Serve)
Sample Tip #35
When returning a fast serve, aiming the return deep down the
middle of the court provides a big target for greater consistency
and limits your opponent's angles. (Chapter 6 - Return of Serve)
Sample Tip #36
Returning serve with the forehand on the deuce side and with the
backhand on the ad side speeds up your recovery to the middle of
the court. (Chapter 6 - Return of Serve)
Sample Tip #37
On the return of serve, position yourself forward if adopting an
aggressive strategy or move back if lengthening the point works in
your favor. (Chapter 6 - Return of Serve)
Sample Tip #38
For many recreational players, the second serve is the easiest
ball received during the point so plan ahead and take full
advantage of its helpful characteristics. (Chapter 6 - Return of
Serve)
Sample Tip #39
The return of serve is not just another groundstroke because the
serve bounces higher, is usually faster, and can curve right or
left and therefore is a shot that needs to be practiced
diligently. (Chapter 6 - Return of Serve)
Sample Tip #40
The first four shots, including the serve and return, are by far
the most important segment of the point. You may think the rally
is just getting started, but it is often already over. (Chapter 6
- Return of Serve)
Sample Tip #41
A great forehand begins with good positioning, and to obtain this
you must utilize the best stance for the circumstances and align
your legs to provide balance and power in the least amount of
time. (Chapter 7 - Forehand)
Sample Tip #42
The open stances are used when receiving high and fast balls and
have the advantages of quick execution and strong power generated
from the legs pushing from the ground and swiveling of the hips
and shoulders. (Chapter 7 - Forehand)
Sample Tip #43
The semi open stance is used on balls received above the waist
when positioned in the middle part of the court. It has the same
advantages as the open stance but with superior forward momentum
and hip rotation. It is the stance that complements the most
devastating shot from the baseline - the inside forehand. (Chapter
7 - Forehand)
Sample Tip #44
The neutral stance is used on lower balls and it has the
advantages simple weight transfer and straighter and longer
racquet extension through contact. (Chapter 7 - Forehand)
Sample Tip #45
On the neutral stance, the front foot hits the ground a moment
before contact to secure forward momentum while the back foot
pivots to the right to allow the hips to rotate fluently and
expedite the recovery process. (Chapter 7 - Forehand)
Sample Tip #46
Hop steps, where one foot pushes from the ground and hops through
contact, while the other foot lifts in different directions to
balance out the body, are used in various situations when time is
limited. (Chapter 7 - Forehand)
Sample Tip #47
Begin the forehand by turning your body as a unit. That is,
keeping your arms relatively still while pivoting your right foot,
lifting your left heel, and turning your shoulders with your left
hand holding the throat of the racquet. (Chapter 7 - Forehand)
Sample Tip #48
Keeping your non-dominant hand on the throat of the racquet during
the unit turn helps turn the shoulders, set the grip, and guide
the racquet into the correct swing path during the backswing.
(Chapter 7 - Forehand)
Sample Tip #49
As the racquet goes back in a circular fashion, it should stay to
the right or to the “outside”. When compared to longer "inside”
backswings, the outside backswing speeds up execution and improves
shot accuracy due to its straighter path to contact. (Chapter 7 -
Forehand)
Sample Tip #50
At the end of the backswing establish the power position by
loading the legs, straightening the left arm, and pointing the
racquet towards the right side of the back fence with the strings
above the wrist and facing down. (Chapter 7 - Forehand)
Sample Tip #51
Straightening the non-hitting arm in the power position provides
counterpoint strength for the hitting arm and activates the
oblique muscles preparing them for the hip rotation that follows.
(Chapter 7 - Forehand)
Sample Tip #52
After establishing the power position, the hips rotate to lag the
racquet and stretch the shoulder and arm muscles adding “sling
shot” acceleration to the forward swing. (Chapter 7 - Forehand)
Sample Tip #53
Following the racquet lag, the racquet head drops below the ball
and the racquet butt cap moves forward pointing towards the ball.
(Chapter 7 - Forehand)
Sample Tip #54
After the racquet butt cap moves forward, the racquet head moves
closer to the body and then away, or inside-to-outside to the
contact point. (Chapter 7 - Forehand)
Sample Tip #55
It’s natural to think because the ball moves in linear fashion
that the forehand should be a linear type swing. However to
maximize kinesthetic power, the forehand swing should arc up on
the backswing and then curve forward to meet the ball. (Chapter 7
- Forehand)
Sample Tip #56
As the racquet moves toward the ball the wrist moves forward to
add racquet speed and square up the racquet face to the target.
(Chapter 7 - Forehand)
Sample Tip #57
From a front view when hitting a topspin forehand, the racquet
head should be at an eight o’clock angle and below the ball before
making contact. (Chapter 7 - Forehand)
Sample Tip #58
The windshield wiper motion often sees the racquet rotate over 180
degrees. (Chapter 7 - Forehand)
Sample Tip #59
It is important to make contact in front of your body where your
physical strength, swing momentum, and vision is best served.
(Chapter 7 - Forehand)
Sample Tip #60
Great forehand players use good extension whereby their racquet
drives “through” the ball and moves parallel to the target
following contact. (Chapter 7 - Forehand)
Sample Tip #61
Keeping the head stationary at contact holds the chest still for a
longer extension and straighter racquet path towards the target.
(Chapter 7 - Forehand)
Sample Tip #62
On the flat forehand, the racquet finishes behind the head and the
hitting elbow ends at shoulder height pointing towards the target.
(Chapter 7 - Forehand)
Sample Tip #63
On the topspin forehand, the racquet fans across the body and
finishes in a horizontal fashion below shoulder height. (Chapter 7
- Forehand)
Sample Tip #64
The inside forehand is the most dangerous shot from the baseline -
it’s a stroke that players with powerful forehands should use
frequently. (Chapter 7 - Forehand)
Sample Tip #65
There are five types of topspin forehands(arc, drive, loop, angle
and kill) and having the ability to do all five allows players to
use the most effective tactical response to a variety of different
styled opponents. (Chapter 7 - Forehand)
Sample Tip #66
The slice forehand’s compact nature makes it is an important
defensive shot on very wide and low balls. (Chapter 7 - Forehand)
Sample Tip #67
The one-handed and two-handed backhands have different advantages
and disadvantages and which one a player uses depends largely on
degree of physical strength and natural proclivity. (Chapter 8 -
Backhand)
Sample Tip #68
The different advantages of the one-handed and two-handed backhand
raise an interesting question: could the game evolve such that we
see some players begin to use the two-handed backhand to handle
the speed of the serve on the return and then the extra racquet
speed and variety of the one-handed backhand after the return?
(Chapter 8 - Backhand)
Sample Tip #69
The closed stance is the most powerful stance on the backhand
because it creates a large, strong forward step and aligns the
hips in a good position to swing the racquet in a powerful
inside-outside path towards the ball. (Chapter 8 - Backhand)
Sample Tip #70
The cross court backhand(left) sees the front foot less turned and
back foot less behind the body than on the down-the-line
backhand(right). (Chapter 8 - Backhand)
Sample Tip #71
To expedite the recovery process, swing the left foot around to
finish level with the right foot while completing the follow
through. (Chapter 8 - Backhand)
Sample Tip #72
For two-handed backhand players, sometimes the open stance is
needed on the high or wide balls. The open stance technique sees
the player planting the outside leg and transfering body weight to
the inside leg as they swing the racquet. (Chapter 8 - Backhand)
Sample Tip #73
The banana backswing sees the player drop the hands below the
waist before raising them again at the end of backswing. This
backswing has the advantages of efficiency and good topspin.
(Chapter 8 - Backhand)
Sample Tip #74
The loop backswing sees the player circling the racquet back into
the power position. This backswing generates power through a long
movement of the arms and hips and produces a flatter shot than the
banana backswing. (Chapter 8 - Backhand)
Sample Tip #75
Ground the right foot at the end of the backswing to secure the
forward momentum and then swing the racquet forward from
low-to-high. (Chapter 8 - Backhand)
Sample Tip #76
At contact, keep the head still, shoulders level, and hit the ball
in front of the body. (Chapter 8 - Backhand)
Sample Tip #77
Immediately following contact, the left arm straightens and the
racquet continues to move forward parallel to the target. (Chapter
8 - Backhand)
Sample Tip #78
The one-handed topspin backhand begins with the shoulders turning,
the elbows bent and relaxed, and the racquet head tilted up.
(Chapter 8 - Backhand)
Sample Tip #79
At the end of the backswing, the right foot secures the forward
momentum and the hitting arm straightens and stays close to the
body. (Chapter 8 - Backhand)
Sample Tip #80
Keeping the elbow low and close to the body produces a powerful
inside-to-outside swing and helps add topspin to the stroke.
(Chapter 8 - Backhand)
Sample Tip #81
Make contact well in front of the body with the head still and
keep the racquet moving forward parallel to the target well after
contact. (Chapter 8 - Backhand)
Sample Tip #82
The best one-handed backhands are long sweeping motions where the
hitting arm finishes the stroke high and fully extended. (Chapter
8 - Backhand)
Sample Tip #83
Unlike the topspin backhand, a good slice backhand can still be
hit well with little to no forward momentum making it an essential
defensive shot. (Chapter 8 - Backhand)
Sample Tip #84
The slice backhand begins by turning shoulders and setting the
racquet face open and positioned around head-high. (Chapter 8 -
Backhand)
Sample Tip #85
Drive the racquet forward with the shoulder by straightening the
arm and keeping the wrist firm. (Chapter 8 - Backhand)
Sample Tip #86
The racquet face that was open on the backswing, squares up for
contact. (Chapter 8 - Backhand)
Sample Tip #87
On the slice backhand the racquet follows a hammock-shaped path -
don’t chop down too sharply on the ball. (Chapter 8 - Backhand)
Sample Tip #88
Finish the slice backhand with the left arm behind the body and
the racquet open, shoulder-high, and pointing towards the target.
(Chapter 8 - Backhand)
Sample Tip #89
The drop shot can prey on an opponent’s movement as well as draw a
defensive baseline player out of their comfort zone and up to the
net. (Chapter 9 - Drop Shot and Lob)
Sample Tip #90
The drop shot should be played with a light forward step and a
short, sharp downward swing. (Chapter 9 - Drop Shot and Lob)
Sample Tip #91
The drop shot is best hit when you receive a waist-to-chest high
ball while positioned around the service line area of the court.
(Chapter 9 - Drop Shot and Lob)
Sample Tip #92
Besides presenting your opponent with a difficult overhead or a
scramble to run the ball down, good lobbing can also lead to less
aggressive net positioning from your opponent. (Chapter 9 - Drop
Shot and Lob)
Sample Tip #93
The height of the lob will depend on the situation. If positioned
very wide of the court, the high lob will allow time to recover.
(Chapter 9 - Drop Shot and Lob)
Sample Tip #94
The slice approach shot can be performed quickly so it often makes
sense when time is limited. (Chapter 10 - Approach Shot)
Sample Tip #95
The approach shot should be hit deep and to the opponent’s weaker
groundstroke or to the side that forces your opponent to run the
greatest distance. (Chapter 10 - Approach Shot)
Sample Tip #96
The forward hop step is often used on the approach shot to speed a
players movement to the net. (Chapter 10 - Approach Shot)
Sample Tip #97
When attacking the net, establish positioning in the mid-point of
your opponents passing shot angles by favoring the approach shots
side of the court. (Chapter 10 - Approach Shot)
Sample Tip #98
Playing the net is an adrenalized and athletic situation where
winning or losing the point can happen in an instant. Your
mentality at net must reflect this and playing volleys should be
executed with a feisty and assertive attitude. (Chapter 11 -
Volleys)
Sample Tip #99
In the ready position at net, lower your body, establish a wide
stance, and keep your hands up and well in front of the body.
(Chapter 11 - Volleys)
Sample Tip #100
Due to the limited time at net, the continental grip should be
used on both the forehand and backhand volleys. (Chapter 11 -
Volleys)
Sample Tip #101
The legs play a crucial role in providing the power, balance, and
court positioning for winning at the net. (Chapter 11 - Volleys)
Sample Tip #102
Widening the stance and bending the knees on low volleys will help
the shoulders stay level and head upright for better racquet
control. (Chapter 11 - Volleys)
Sample Tip #103
Following the split step, pivot the right foot to assist fast
movement to the right to play a forehand volley. (Chapter 11 -
Volleys)
Sample Tip #104
On most volleys the front foot should land an instant after making
contact with the ball. (Chapter 11 - Volleys)
Sample Tip #105
There are three main steps with the front foot on the volley -
straight(left), lunge(middle), and away(right). (Chapter 11 -
Volleys)
Sample Tip #106
On the forehand volley, prepare for the shot by making a U-shape
formation with the racquet and arm. (Chapter 11 - Volleys)
Sample Tip #107
Laying the wrist back on the forehand volley creates a position
of leverage whereby a small movement of the wrist results in a
large movement of the racquet head. (Chapter 11 - Volleys)
Sample Tip #108
On the forehand volley, open and set the racquet above the ball
and move it forward on a gentle high-to-low gradient. (Chapter 11
- Volleys)
Sample Tip #109
After contact finish with the racquet on the side of the body and
facing roughly parallel to the target. (Chapter 11 - Volleys)
Sample Tip #110
On most backhand volleys, the racquet head should line up level
with the left shoulder at the end of the backswing. (Chapter 11 -
Volleys)
Sample Tip #111
On the backhand volley, set the racquet head above the ball with
the elbow slightly bent and then straighten the elbow as the
racquet moves forward to meet the ball. (Chapter 11 - Volleys)
Sample Tip #112
It's important to make contact in front of the body on the
backhand volley. (Chapter 11 - Volleys)
Sample Tip #113
The left arm moves backwards for balance and helps the racquet
move in a straight path towards the target. (Chapter 11 - Volleys)
Sample Tip #114
The swinging volley uses a regular groundstroke swing and is
typically hit from the middle of the court when receiving a high,
slow moving ball. (Chapter 11 - Volleys)
Sample Tip #115
The control needed for a drop volley necessitates a technique in
which the racquet moves very little making the wrist the primary
body link on this shot. (Chapter 11 - Volleys)
Sample Tip #116
Like the drop shot, the drop volley should be played when you have
a reasonable amount of time and good balance. (Chapter 11 -
Volleys)
Sample Tip #117
On the half volley, lower the body, place the racquet behind the
expected bounce of the ball, and use a short, low-to-high swing.
(Chapter 11 - Volleys)
Sample Tip #118
On the overhead, try to position yourself deep enough in the court
to ensure you can push off the back foot and transfer your body
weight forward into the shot. (Chapter 11 - Volleys)
Sample Tip #119
If the forehand is a physically stronger motion and permits a
longer reach when compared to the backhand, could replacing the
backhand with a forehand done by the non-dominant arm be a common
method of play in the future? (Chapter 12 - Future Strokes)
Sample Tip #120
For dual forehand players I recommend the overlapping grip which
allows each hand to start low in the grip for added power and
reach when using this method of play. (Chapter 12 - Future
Strokes)
Sample Tip #121
The key to learning a motor skill well, especially a new one, is
to slow things down and increase the difficulty gradually.
(Chapter 12 - Future Strokes)
Sample Tip #122
The reverse serve sees the player brushing the left side of the
ball creating a left-handed type spin for right-handed players
making their serve more dangerous and unpredictable. (Chapter 12
- Future Strokes)
Sample Tip #123
The step forward by the front foot during the backswing of the
volleyball serve adds power and raises the contact point on the
serve. (Chapter 12 - Future Strokes)
Sample Tip #124
Drawing the correct strategic conclusions during a match requires
not only a thorough knowledge of tennis, but also an awareness of
your strengths and weaknesses and being observant to those same
qualities in your opponent. (Chapter 13 - Singles Strategy)
Sample Tip #125
To shift sensibly between the offensive, neutral, and defensive
phases you sometimes need to be patient and resolute while at
other times alert and ready to pounce. (Chapter 13 - Singles
Strategy)
Sample Tip #126
The inside-out forehand is a key shot when looking to take charge
of the point in the offensive phase. (Chapter 13 - Singles
Strategy)
Sample Tip #127
During the neutral phase mixing up the spin, speed, and height of
shot to disrupt the opponent's timing should be a prime focus.
(Chapter 13 - Singles Strategy)
Sample Tip #128
The purpose of your shot will vary depending on your court
positioning. (Chapter 13 - Singles Strategy)
Sample Tip #129
If your opponent is scrambling, move forward to steal time and
rush them on their next shot. (Chapter 13 - Singles Strategy)
Sample Tip #130
When receiving a high ball during a baseline rally, it often makes
sense to drop back and hit the ball at a more comfortable height.
(Chapter 13 - Singles Strategy)
Sample Tip #131
After hitting a cross court shot, position yourself slightly on
the same side as where you hit the ball from. This will place you
in the midpoint of your opponent’s angles. (Chapter 13 - Singles
Strategy)
Sample Tip #132
Recreational players, like champion players, must develop shot
patterns that make best use of their strongest strokes. (Chapter
13 - Singles Strategy)
Sample Tip #133
Every opponent has a favorite side to hit their groundstrokes; use
this knowledge to help “funnel” the rally into a shot pattern you
enjoy. (Chapter 13 - Singles Strategy)
Sample Tip #134
Due to its shorter distance, the down-the-line groundstroke can be
an effective offensive shot when positioned inside the baseline.
(Chapter 13 - Singles Strategy)
Sample Tip #135
To reduce errors, play with good net clearance and hit well inside
the sidelines especially if you are not controlling the point.
(Chapter 13 - Singles Strategy)
Sample Tip #136
Hitting deep gives your opponent less time to set up for their
shots increasing the likelihood they will mistime their swing and
make an error. (Chapter 13 - Singles Strategy)
Sample Tip #137
If you can execute a game plan that gives you a small edge, you
should win. Winning 55% of the points allows you to win 99% of the
time. (Chapter 13 - Singles Strategy)
Sample Tip #138
Sit down with a pen and paper and write out your strengths and
weaknesses. It is only through self-awareness that you can know
how to play your matches intelligently. (Chapter 13 - Singles
Strategy)
Sample Tip #139
Attacking the net can be an effective tactic against a defensive
player. (Chapter 13 - Singles Strategy)
Sample Tip #140
Hitting slice groundstrokes to a power hitter lowers their strike
zone and reduces their speed of shot. (Chapter 13 - Singles
Strategy)
Sample Tip #141
The frequent use of the inside forehand has made the down-the-line
backhand an important shot in the modern era. (Chapter 13 -
Singles Strategy)
Sample Tip #142
Champion players have a keen sensitivity to all the objective
variables (court speed, weather) and subjective variables
(emotions, confidence) a tennis match brings. (Chapter 13 -
Singles Strategy)
Sample Tip #143
Attacking an opponent’s weak shot repeatedly will go one of two
ways; the stroke will crumble or the repetition will help it. You
must decide whether it is best to stay relentless or mix up your
shots more. (Chapter 13 - Singles Strategy)
Sample Tip #144
Play practice matches against a variety of playing styles,
including aggressive net rushers, all-court players, and defensive
baseline players. Mixing up your style of opponent will help you
learn what shot patterns work best against different types of
players. (Chapter 13 - Singles Strategy)
Sample Tip #145
Serving down the center line towards the “T” is a great way to get
your partner at net involved in the point. (Chapter 14 - Doubles
Strategy)
Sample Tip #146
Mix up the placement and spin on your serve to keep your opponent
off rhythm and aim to get a very high percentage of your first
serves in. (Chapter 14 - Doubles Strategy)
Sample Tip #147
Talk with your partner about where you are going to serve so they
can be ready to shift to the best position to react to the
opponents return. (Chapter 14 - Doubles Strategy)
Sample Tip #148
Your serve’s location will influence where to split step (see SS1
and SS2) when you serve and volley. (Chapter 14 - Doubles
Strategy)
Sample Tip #149
A set of doubles is played in four game rotations; at the end of
each game, players change their role and responsibilities. The
more you and your partner do each of your “jobs” well, the more
likely you will perform as a cohesive and successful team.
(Chapter 14 - Doubles Strategy)
Sample Tip #150
The server's partner at net should be in motion and moving forward
immediately after hearing the serve being struck. (Chapter 14 -
Doubles Strategy)
Sample Tip #151
The “I” formation can cause problems for opponents on their return
because they don’t know which way the net player will move after
the serve. (Chapter 14 - Doubles Strategy)
Sample Tip #152
The compact nature of the slice backhand swing makes it a good
doubles shot to use on the return serve before attacking the net.
(Chapter 14 - Doubles Strategy)
Sample Tip #153
The receiver's partner should be facing the opposing net player.
(Chapter 14 - Doubles Strategy)
Sample Tip #154
If your partner hits a good return, move forward and look to
intercept your opponents defensive reply. (Chapter 14 - Doubles
Strategy)
Sample Tip #155
If your partner attempts a down-the-line shot, shift to the middle
of the court to cover your opponents shot through the center.
(Chapter 14 - Doubles Strategy)
Sample Tip #156
With the receiver’s partner positioned at the baseline(right
background), the serving team doesn’t have an easy target to
volley through. (Chapter 14 - Doubles Strategy)
Sample Tip #157
When playing the net as a team follow the ball right and left to
best cover your opponent’s angles. (Chapter 14 - Doubles Strategy)
Sample Tip #158
Moving forward off the baseline to establish the net as a team
places pressure on the opposing to hit the ball lower and faster.
(Chapter 14 - Doubles Strategy)
Sample Tip #159
Have your weight forward as you split step at net and be ready to
move forward to hit the volley. (Chapter 14 - Doubles Strategy)
Sample Tip #160
If you sense your opponents are in trouble or rushed on their
shot, move forward and look to attack their reply as close to the
net as possible. (Chapter 14 - Doubles Strategy)
Sample Tip #161
Following a defensive volley, shift backwards and prepare to
defend against your opponent’s aggressive shot. (Chapter 14 -
Doubles Strategy)
Sample Tip #162
The staggered formation at the net(foreground) leads to more
aggressive poaching, improved lob coverage, and better
communication on balls hit down the middle. (Chapter 14 - Doubles
Strategy)
Sample Tip #163
During the cross court rally the server’s partner(SP) should move
to the left when the ball is hit to the left(R1) and move right
when the ball is hit to the middle of the court(R2). (Chapter 14 -
Doubles Strategy)
Sample Tip #164
If you sense your partner at the baseline is in trouble, look back
to see the quality and placement of their shot. This will help you
get a head start on your next court positioning move. (Chapter 14
- Doubles Strategy)
Sample Tip #165
When the returner (R) moves forward from “A” to “B”, the server’s
partner (SP) should move backwards from “A” to “B”. (Chapter 14 -
Doubles Strategy)
Sample Tip #166
Poaching is a great way to hit winning volleys and disarm
opponents by forcing them to hit their shots lower, faster, and
wider to avoid a poaching net player. (Chapter 14 - Doubles
Strategy)
Sample Tip #167
The deeper player must communicate and direct their poaching team
mate to either stay or switch to the other side court. (Chapter
14 - Doubles Strategy)
Sample Tip #168
Forward diagonal movement reduces the time available for your
opponents to react to your shot, allows you to hit the ball at a
greater height, and creates better angles. (Chapter 14 - Doubles
Strategy)
Sample Tip #169
Hitting the poached shot towards the opposing net player gives
that player very little time to respond to your shot. (Chapter 14
- Doubles Strategy)
Sample Tip #170
Hitting the ball low(left) through the middle of the
court(center), or at the body(right) are three effective shots
against the opposing team both at net. (Chapter 14 - Doubles
Strategy)
Sample Tip #171
When playing the net, the area behind the opposing net player
represents a prime location(or “gold mine”) to hit winners.
(Chapter 14 - Doubles Strategy)
Sample Tip #172
Low volleys should be placed away from the opposing net player and
to the deeper-positioned doubles opponent. (Chapter 14 - Doubles
Strategy)
Sample Tip #173
Unless the opponents lob is very deep, overheads should be
directed to the closer opponent’s side of the court. (Chapter 14 -
Doubles Strategy)
Sample Tip #174
Attacking the net produces pressure and rhythm of play that
defensive doubles teams often dislike. (Chapter 14 - Doubles
Strategy)
Sample Tip #175
If you are playing with a weaker partner, take more chances with
your poaching and look to dominate the middle of the court.
(Chapter 14 - Doubles Strategy)
Sample Tip #176
Discussing strategy before the point leads to quicker court
position shifts and more assertive shot decisions. (Chapter 14 -
Doubles Strategy)
Sample Tip #177
Always stay positive when talking with your partner and convey
through your body language that you are excited and eager to play.
(Chapter 14 - Doubles Strategy)
Sample Tip #178
Which side of the court you decide to receive serve in doubles
depends partly on which direction you prefer to hit your strongest
groundstroke. (Chapter 14 - Doubles Strategy)
Sample Tip #179
Good doubles partners share the blame and deflect the praise.
(Chapter 14 - Doubles Strategy)
Sample Tip #180
If you get along well with your doubles partner, you will practice
together more and understand each other’s game better. (Chapter
14 - Doubles Strategy)
Sample Tip #181
In tennis you need to be both mentally strong to stay determined
and mentally positive so you compete in an emotionally elevated
and energetic manner. (Chapter 15 - Psychology)
Sample Tip #182
The messages spoken by your inner voice are energy impulses that
affect how your brain processes the match. You can be winning but
feel flat, or you can be losing but still be energized, all by the
messages sent through the mind. (Chapter 15 - Psychology)
Sample Tip #183
Train yourself so that when a negative thought enters your mind,
you recognize it, dismiss it, and replace it with a positive
thought. (Chapter 15 - Psychology)
Sample Tip #184
Rituals such as straightening your strings can relax and clear the
mind after a frustrating point. (Chapter 15 - Psychology)
Sample Tip #185
Dwelling on your previously missed shot only reinforces that
mistake in your mind and increases the likelihood of making the
same mistake again. (Chapter 15 - Psychology)
Sample Tip #186
Focus on the process, not the result. Agassi once wrote, “Freed
from the thoughts of winning, I instantly play better. My shots
become a half-second quicker, my decisions become the product of
instinct rather than logic.” (Chapter 15 - Psychology)
Sample Tip #187
Arthur Ashe once said, “Success is a journey, not a destination.
The doing is often more important than the outcome.” (Chapter 15 -
Psychology)
Sample Tip #188
Anxiety’s effect on your level of play is largely based on your
perception. Embrace a mindset that you are lucky to be healthy
playing a sport you enjoy, and view your tennis career as an
evolving process of learning, adventure, and self-discovery.
(Chapter 15 - Psychology)
Sample Tip #189
Ironically, it is by letting go slightly that your nerves recede
and you play better. You will play your best when you trust your
swing and have the confidence that your body will do the right
thing. (Chapter 15 - Psychology)
Sample Tip #190
When things are not going your way take a five second pause and
walk away from the action. A step back can help you see a problem
from a new perspective and increase your ability to control your
emotions. (Chapter 15 - Psychology)
Sample Tip #191
Acknowledging an opponent's good shot will help you put the point
behind you and keep your mind in a positive state. (Chapter 15 -
Psychology)
Sample Tip #192
In a pressured situation, a smile can help you defuse negative
feelings and keep your energy level elevated. (Chapter 15 -
Psychology)
Sample Tip #193
Tennis is a uniquely athletic sport and fitness underpins every
aspect of the game. (Chapter 16 - Fitness)
Sample Tip #194
There have been many examples on the pro tour of players devoting
themselves to fitness and seeing their best results quickly
follow. (Chapter 16 - Fitness)
Sample Tip #195
Improving your flexibility will add power to your stroke and
improve your balance on difficult wide and low balls. (Chapter 16
- Fitness)
Sample Tip #196
Flexibility reduces the likelihood of muscle tears and pulls by
lengthening the muscles and providing a good framework for
strengthening the joints of the body that experience extreme
motions. (Chapter 16 - Fitness)
Sample Tip #197
Stretching after your match or practice sessions will reduce
inflammation and leave you feeling less sore and stiff the
following day. (Chapter 16 - Fitness)
Sample Tip #198
In tennis, you must be agile to stop and start quickly after
moving in a variety of directions all while maintaining balance to
hit the ball effectively. (Chapter 16 - Fitness)
Sample Tip #199
Improving foot speed will extend more points and increase the time
you have to set up for the stroke leading to more powerful and
accurate shot making. (Chapter 16 - Fitness)
Sample Tip #200
Strengthening the core muscles will add power to your strokes and
improve your movement to the ball as well as speed up the recovery
process. (Chapter 16 - Fitness)
Sample Tip #201
Resistance band exercises are low impact, good for warming up the
muscles, and can be easily used to mimic the tennis strokes.
(Chapter 16 - Fitness)
Sample Tip #202
Superior cardiovascular endurance allows the body to recover
quickly and be ready for the next point. (Chapter 16 - Fitness)
Sample Tip #203
Eating and drinking correctly can mean the difference between
feeling strong and energetic for the entire match or feeling
sluggish throughout and faltering at the end. (Chapter 16 -
Fitness)
 Marty Smith has
been the Director of Tennis for more
than 20 years at the famed New York Athletic Club, the No.
1-rated athletic club in the United States. A native of
Australia, he was a top five-ranked Australian junior players
and was the two-time Southern Conference singles and doubles
champion at the University of Tennessee at Chattanooga. He
graduated from UTC and also received his MBA at St. Thomas
University in Miami. He is a resident of Pelham, NY.
Marty Smith has
been the Director of Tennis for more
than 20 years at the famed New York Athletic Club, the No.
1-rated athletic club in the United States. A native of
Australia, he was a top five-ranked Australian junior players
and was the two-time Southern Conference singles and doubles
champion at the University of Tennessee at Chattanooga. He
graduated from UTC and also received his MBA at St. Thomas
University in Miami. He is a resident of Pelham, NY.
